


This past weekend, I added a bunch of sound dampening tiles to my home office to make it sound less “echo-y” when recording audio in the room.
I’ve always loved sound recording rooms, the walls covered in sound dampening foam tiles. There’s just something about the quietness of these rooms. Getting to see Dell’s hemi-anechoic (no echos other than from the floor) chamber in Austin a year or so ago was excellent. It’s where they test servers and stuff for things like noisy fans, so they can bring you gear like the VRTX that are powerful, but also quiet.
My house has wooden floorboards, so everywhere has a slight echo that you can hear if you know what to listen for. And my office doesn’t have much in the way of soft furnishings (I really must get a couch one day), so there’s echo in there as well. Putting down carpet isn’t an option (floorboards are easier to keep clean), and I didn’t want to drape fabric over everything.
I bought 3 boxes of 520mm x 540mm square-ish acoustic foam tiles for $150 delivered. Australia isn’t a cheap place to buy stuff, so you can probably get it cheaper in other locations. The tiles have 370mm deep ‘wedges’ across the tiles, not the ‘pyramid’ dimpled stuff you see in protective cases, though you can buy those too. Deeper wedges provide better dampening, apparently, so that’s what I went with. Each box has 10 tiles.

A box of acoustic tiles
How Not to Attach the Tiles
Let’s just attach them to the wall, eh? A bit of good old Bostic Blu-tack should do the trick, I thought, but sadly, no. As an experiment to test if the tiles would actually go anything (they do) it was useful, but the foam doesn’t really stick to the Blu-tack very well, so the tiles fall off the walls too easily.

Tiles go on, tiles fall off.
Also, Blu-tack isn’t a great solution for long-term adhesion, as it tends to damage painted plasterboard walls. What to do?
I didn’t want to permanently affix the tiles with nails or screws, partly because positioning them would be tricky and tedious, and partly because I’d probably want to be able to remove them, or move them about if I rearrange the office. That and my wife was somewhat—ambivalent—about the whole idea. Abandoning the experiment needed to remain an option, and one without having to patch and repaint walls would be best. I hate painting.
The solution was staring me in the face. See those framed certificates? My office has picture rails all around the walls, and that’s how the certificates were hung on that wall. Why not do the same thing with the tiles?
I experimented with using paperclips, the glitter of office supplies, to go through the tiles and attach to some fishing line, but they didn’t grip well enough, even with some Blu-tack to assist. The tiles weigh just enough to put some strain on the attachment mechanism that it would need to be a bit more robust.
Here’s what I ended up doing.
Hanging Acoustic Tiles with Fishing Line
Basically, we sew fishing line down both sides of a row of tiles, and hang the lines from the picture rail. You end up with a vertical stack of tiles that you can hang anywhere on the wall, and form an array of them by hanging multiple rows beside each other.
You will need:
- Wall with a picture rail or similar hanging thing. If you don’t have one on your wall, you can use picture hooks instead as your anchor points, but that’s a little more permanent.
- Some fishing line. This is 20lb breaking strain stuff I had lying around the place. The total weight of 10 tiles is about 2.5kg, so you won’t need really heavy guage stuff.
- Scissors, to cut the line with. A knife would also work.
- A darning needle. This is a big one with a large eye, so that the fishing line will fit through. A smaller sewing needle will be too small.
- Paperclips, to hang from the picture rail.
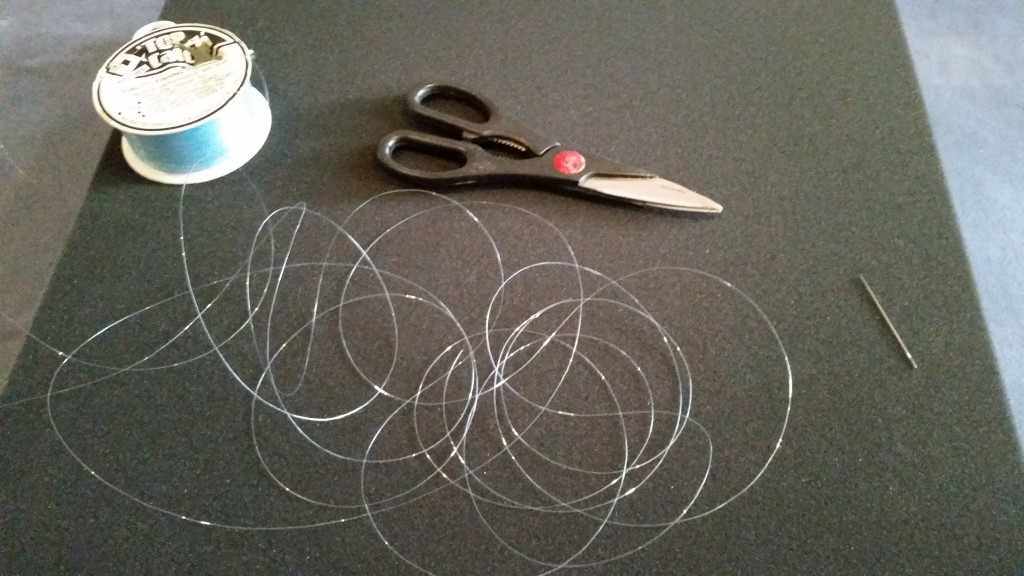
Assemble your materials.
The anchor point can be anything, including proper picture rail anchor points if you have them. I used paperclips because I have heaps of them and they don’t get used for anything else, really.
Bend them apart to look like this, and attach the fishing line with your knot of choice. I used what I think is a clove hitch, but Boy Scouts was so long ago I have no idea any more.
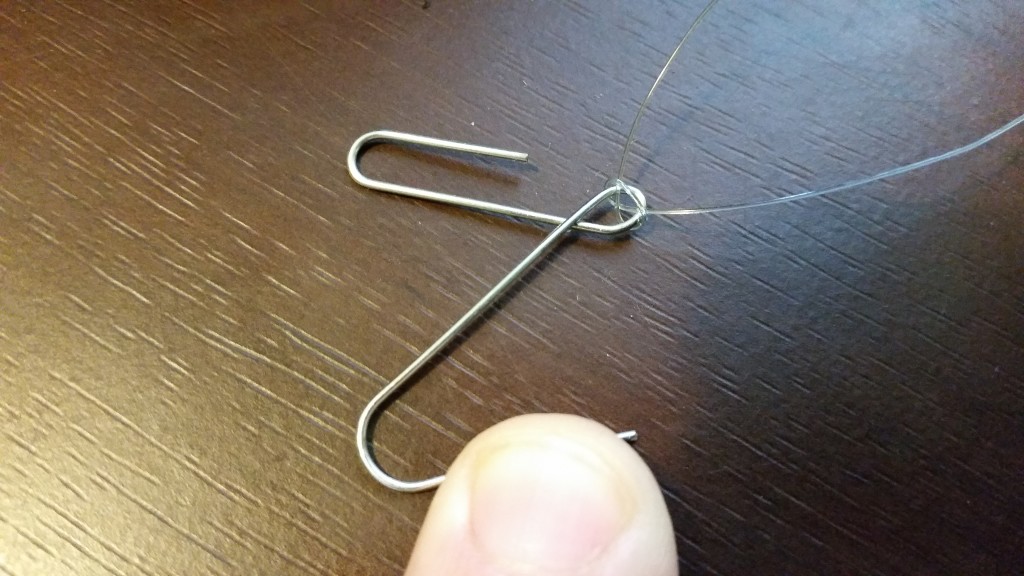
A paperclip becomes an anchor. Does anyone use these to clip paper any more?
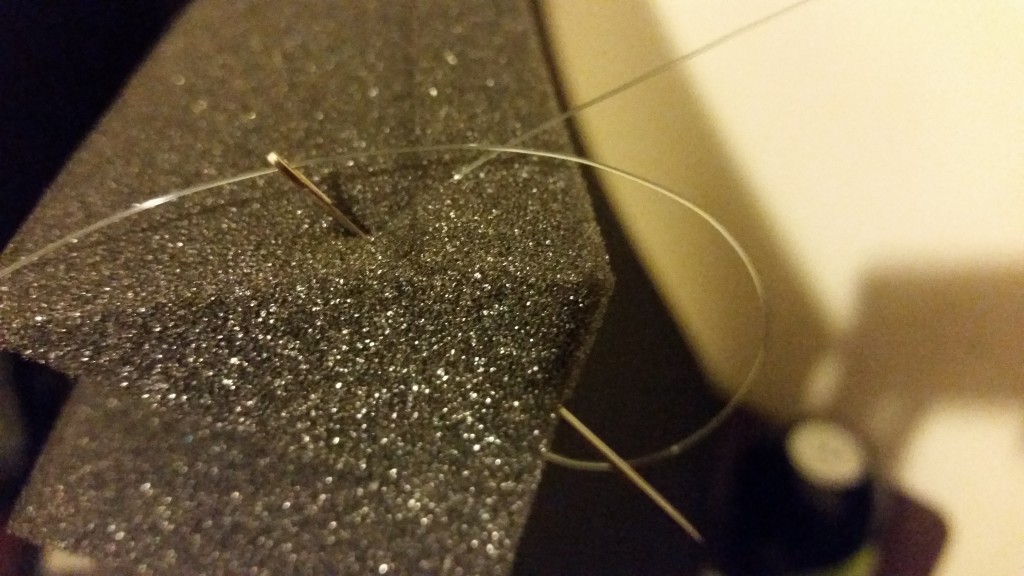
Then we sew the fishing line through the tiles. You want to go through a goodly portion of the tile so that it provides a bit of friction on the line, which will help to hold the tile in place when you’re hanging them. This is why a darning needle is needed; a sewing needle wouldn’t be long enough, even if you could get the line through the eye.
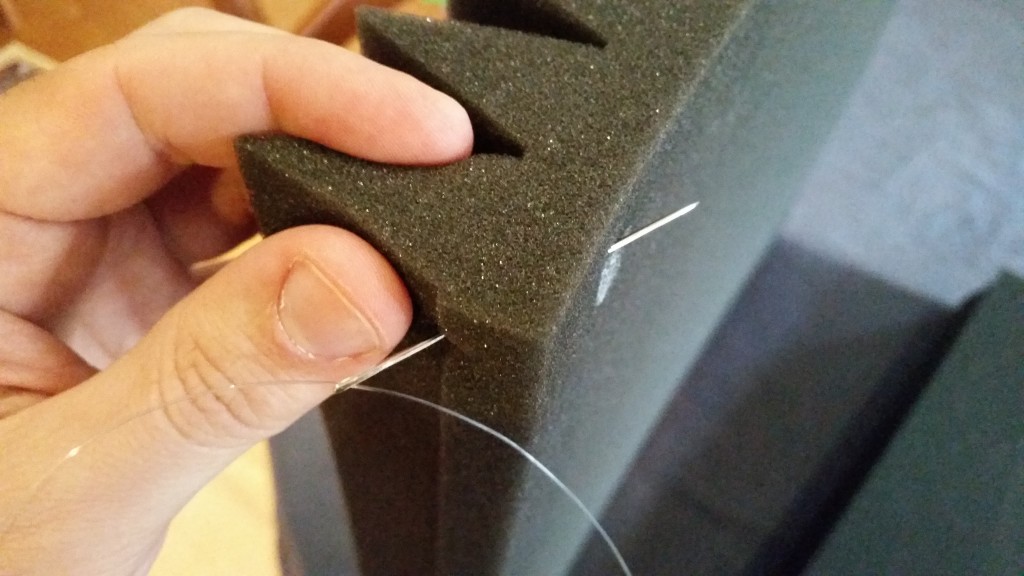
Go through the tile like this. Note the mark left by the Blu-tack experiment.
Now run straight down the back of the tile, and come back through at the other end. This way the line will run down the back of the tile, and provide two vertical guide points on each side of the tile that will help it stay vertically aligned.
Now do this for the next tile in the vertical stack, but rotate it 90 degrees. This will make the ridges run in alternate directions for each tile, which will give you better dampening.
Alternate the orientation of the tiles.
There isn’t quite enough friction between the fishing line and the tiles to hold them in place on the wall, so we’ll need to anchor them to a particular position. If you were to use something rougher than fishing line, like string, you’d get more friction, but you’ll also be able to see the line more easily, so it’s an aesthetic choice, really.
I used what I think is called a blanket stitch at the top of the bottom tile. This meant I could loosen the stitch and move the tile up and down to find the right position, and then lock it off at that spot. Then, the other tiles above it could just slide down the line and rest on top of this tile, so they are nice and close together.
A blanket stitch to hold the tile in place vertically.
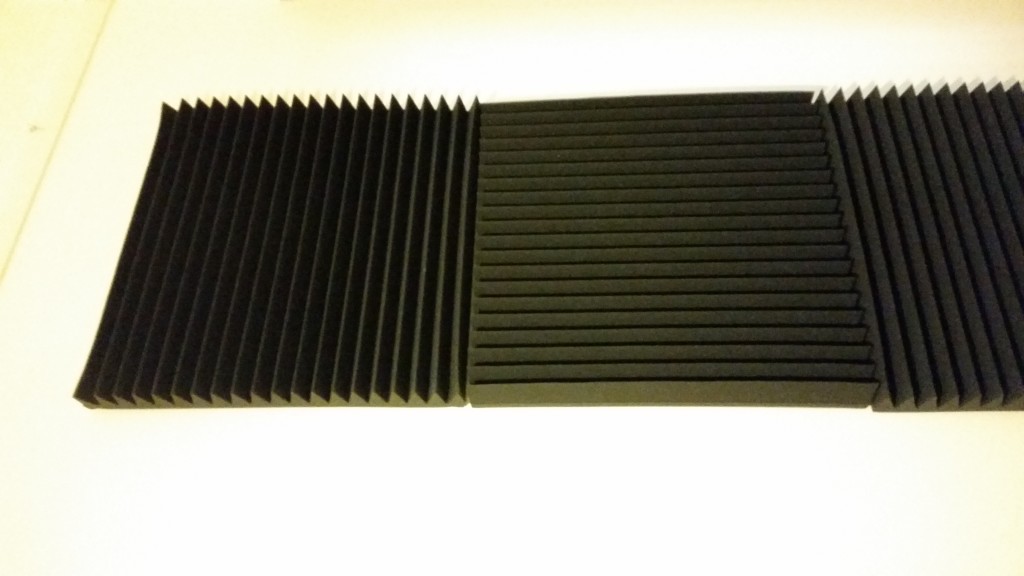
Now you hang the tiles on the wall, and adjust their position to whatever you want. The end result will look something like this.

Acoustic tiled office on the cheap.
You can also use this method to hang tiles off a door. I attached these tiles with thumb-tacks on the top of the door, and used extra blanket stitches to hold the tiles in different positions to avoid the doorknob.

This method also works on doors.
Now I can enjoy slightly dampened sound in my office, and take the tiles off the wall, or just move them around, quickly and easily.
Results
I can happily report that the tiles do work, and while my office isn’t suitable for renting out as a sensory deprivation chamber, it doesn’t have the “echo” that it used to have.
It has also dampened the hum of servers in the room for those outside the room. Inside, I still have the whirring of fans to accompany me through the day, but that’s a project for another time.